How to install Windows 7 on a laptop. How to reinstall Windows: step-by-step instructions
How to install Windows 7Subject self-installation of Windows, one of the most popular among computer and laptop users.
Sooner or later, everyone is faced with the need to install or reinstall their operating system, and then the search begins for friends who can do this. It’s not uncommon for such acquaintances to provide this service for money, but there is demand in the market, which means you can make money on it.
Well, I suggest you learn to cope with this task yourself and no longer spend money on it. To install, we need a disk or flash drive with a Windows distribution. Articles that may be useful if you don’t know how to burn a disc and how to upload to a CD-ROM:
- How to quickly burn a disk image
- How to set disk boot in BIOS
- How to set the BIOS to boot from a flash drive
- How to extract files from an ISO image
- How to create a bootable USB flash drive with Windows
So, if you have everything ready, then you can start. I’ll give you one piece of advice: if you’re installing Windows on a laptop, write off the product key right away so you don’t turn it over during the installation process.

I will install Windows 7 from a flash drive, the settings in the BIOS are set, so immediately after restarting the computer, the installation begins. If you are installing from a CD, then at the very beginning, you may have to press any key on the keyboard to confirm the installation will start

At the very beginning, we are asked to select a language, I leave “Russian” and click “Next”

Everything is clear here, one button “Install”

We accept the license terms

At this step we are asked to choose whether to update the existing Windows or perform a new (full) installation, I choose the second option

Be especially careful here, my hard drive is divided into two (C:) and (D:), and there is also a small system partition, 100 Mb in size. For proper installation, if you are reinstalling an existing system, I recommend formatting the system disk where Windows and this small partition are already installed. I transferred all the important data to disk (D:) in advance, I don’t touch it! Click on the link "Disk Settings"

Now I select the necessary disks one by one and click “Format” (Be careful, all data will be permanently deleted, save them in advance!)


The necessary disks have been formatted, proceed to installation, click the "Next" button

The process of installing data from the disk (flash drive) starts

At the end of the process, the system will automatically reboot, at this moment do not forget to set the default settings in the BIOS or remove the flash drive, otherwise this stage may be repeated :)

We see the familiar installation window, we sit and wait, don’t touch anything, the computer reboots itself

After the reboot, the equipment will be automatically checked and configured

The final stage of installation, here we need to enter a username and come up with a computer name, a username, as you guessed, you also need to come up with, you can write your own :)

You can immediately screw up your account, just to be on the safe side, write down your password somewhere; people often forget it later.

In this window you need to enter the same (license) product key that is located on the sticker on the bottom of the laptop or on the system unit. Click "Next"


Checking if the date and time are correct

Windows finishes applying settings

Done, the desktop appears, installation is complete!

Now all that remains is install drivers and necessary software. As you can see, everything is very simple, now you can earn money by installing only licensed software!
If you still think that installing an operating system is an activity for computer technicians, then you are seriously mistaken.
Using this guide, you can install Windows 7, even if you are a novice PC user. So, let's get ready first.
- Open "My computer" and see in which partition your system is currently installed.
Remember its size and name so that you can find the volume you need during installation. - Collect in advance on a flash drive or other disk all the necessary drivers for your computer or laptop. If there is no disk with drivers, they can be downloaded from the official website of the equipment manufacturer. If you don’t do this, you risk being left without the Internet after installing the new system.
- Which Windows 7 bit depth should I choose? Click « Control Panel -> System and Security -> System»
If your computer or laptop has more than 3 gigabytes of RAM installed, it is definitely worth installing the 64-bit version. In general, we recommend installing x86 only on weak or very outdated hardware in the 21st century, after all :). Please note that the drivers for the same device are different; in fact, these are two different systems! - Download the Windows 7 installation ISO image:
What are these images?
These are original MSDN images downloaded from the official Microsoft website. The only change is that the ability to select the system edition during installation is unlocked. No files are affected and the system is not activated.
Other versions of Windows 7 images can be downloaded. - Prepare a bootable USB flash drive with Windows 7. In this guide, we will install the system from a flash drive because it is faster and easier. Similar instructions on how to create it can be found.
- Since during installation we will format the disk with the installed system, all important files stored on it must first be copied to removable media or to another partition of the hard drive. Remember that files located on the desktop are also stored on the system disk. If you need them, be sure to move them to another place. When formatting, all previously installed programs will be deleted, but this does not mean that they also need to be copied to flash drives and disks. It's easier to reinstall programs, so only worry about – photographs, documents, music, etc.
Create a bootable USB flash drive using . Next, insert it into the USB port and change the boot priority in the motherboard BIOS so that this flash drive boots first. If difficulties arise at this step, here are detailed instructions. If you did everything correctly by changing the boot priority, then after exiting the BIOS and restarting the computer, the message “Press any key” will appear on the screen. Fulfill this requirement - press any key to start booting from the installation media.
You only need to press the key ONCE and only at this stage of installation.
After pressing any key, a message will appear indicating that Windows is downloading files.
System installation
So, let's proceed directly to installing Windows 7. Wait until their extraction is completed, after which the installer start window will appear on the screen. Congratulations, the hardest part is over!

- Select your language, time format and layout. Click "Further".
- Click on the big button "Install" to launch the installation wizard.
- Read the license terms and accept them.
- Select the full installation (updating is not suitable for us).
- After starting the full installation, the partition selection screen appears. The installer window will have several sections: First usually reserved by the system (recovery files are stored in it). It weighs 100 MB and does not need to be touched. Second is a system file - that is, Windows files are stored on it. A new system is being installed on it. Third section – file. User data is stored here and remains intact even after reinstalling Windows.
There may be other options: for example, there is no system-reserved partition or there is no volume with user files. In any case, you need the partition on which the previous system was already installed - it’s not for nothing that when preparing for installation, we advised you to look and remember its size.
If for some reason you still have one partition, the volume of which exceeds 250 GB, then it is better to immediately divide the disk into two volumes: one for Windows and programs (approximately 50-100 GB), the second for personal files. To do this, using the “Disk Setup” tool, delete the existing partition and first create the first volume (“Create” - specify the volume - “Apply”), and then the second.The created volumes must be named “Partition 1”, “Section 2”. There should be no unallocated space left - the system simply will not see it.
So, you have at least two partitions, one of which is dedicated to operating system files. If it has not just been created, but has already been created before, then it needs to be formatted by deleting all data. Click on the link "Disk Setup", highlight a section and press "Format". When formatting, all files on the system partition will be deleted (that is, the values in the “Full size” and “Free” columns will become the same). This is exactly what we wanted. To start a clean installation, click "Further", checking again that the partition you allocated for the system is highlighted.
- We wait. After selecting a partition and starting the installation, a window will appear on the screen in which you can see the process of unpacking Windows 7 files and writing them to the hard drive. While you can rest, you won’t have to do anything for 15-25 minutes. During this installation time, the computer will reboot several times. After the installation is complete, you need to specify some system operating parameters.
- Enter computer name Computer name The computer name is what your computer will be called on the local network. and username. It is advisable to use Latin characters instead of Russian, this will help avoid problems with some programs in the future.
- You can set an administrator password if you wish, but this is not necessary. If you set a password, you will need to enter it every time you start your computer or laptop. We will leave the field empty for now; you can “password” your account later.
- Enter your activation key if you have one. If there is no key, uncheck "Automatically activate" and skip the step by pressing "Further".
- Specify the Windows settings - it is better to select the recommended parameters, when you get to know the new system better, configure it in your own way. After selecting all the necessary parameters, the Windows 7 desktop will appear on the screen. You can begin your acquaintance with the system, but first reboot the computer and go into the BIOS again — here you need to change the boot priority back, putting the hard drive first.
- Turn on automatic system updates and wait until the process completes. Security updates will install most drivers. If there is no Internet, you can use a program to install drivers .
Attention!
Note: choose the version of Windows for which you have an activation key (you will enter it at the final stage of installation). If there is no key, read the instructions after installation.
The instructions turned out to be quite impressive in volume, but now you know the main nuances when installing Windows 7 and can easily do it yourself. Carefully follow the above recommendations and the installation will definitely be successful.
If you are reading these lines, then you have already come to the conclusion that you need to install Windows 7 on your laptop or desktop computer, so there is no point in me explaining for a long time why you need to reinstall the operating system. Let's get right to it.
Ways to install Windows on a laptop
For some reason, readers often ask how Windows is installed on a laptop, although there is no difference in this process with a regular computer. There are several ways. Firstly, you can do this while directly in the loaded operating system. This is relevant if, for example, you want to upgrade from XP to 7. Or if there are some minor glitches in the operation of the operating system, but it still loads. To do this, simply insert a licensed or not-so-licensed DVD into the drive and run the Setup.EXE program, which is located in the root folder of the disk.
However, without going into details, I will say that this option is not very good and it is better to reinstall directly from the disk, without loading the old OS. Moreover, if we are talking about the initial installation, or if the system is so damaged that it does not boot, then this is the only opportunity to install Windows 7 on a computer.
Therefore, it is this method that we will consider today.
How to install Windows 7 - from a flash drive or disk?
Initially, it is assumed that the system is installed from a DVD disc that you buy in a box in a store. However, the disk may not be there if you bought a laptop secondhand, and all the waste paper from it has long been lost, but at the same time there was a licensed Windows there and you don’t want to lose it.
If you don’t have an installation disk, you can burn it to a disc yourself from an ISO image that can be easily downloaded from the Internet. On many different sites there are official releases packaged in a disk image that can be opened with a program such as Image Burn and burned, and a license key can be purchased on the official Microsoft website or you can enter the old one that was already in the system - it can be found on a sticker on the bottom of the laptop .

But there is a better alternative to installing from disk. As you know, the reading speed from optical drives is much lower than from USB, so all professionals do this - create a bootable flash drive, copy images of official “clean” builds of different versions of Windows onto it and carry it with them, always having that operating system at hand that the client will need.
At the same time, Windows is installed from a flash drive many times faster than from a DVD, and there is no need to carry a stack of plastic boxes with disks.
If you don't know how to make a bootable USB flash drive, then watch this detailed video
Installing Windows 7 on a laptop or computer
So, we decided that we will install Windows 7 from a flash drive. To do this, insert our media with Windows, reboot the computer and go into the BIOS. If you don’t know how to get there, then carefully look at what is written on the PC screen when you turn it on - there should be a hint which key to press to enter the BIOS.

Next, you need to find the section that is responsible for selecting the OS boot option. Since there are several manufacturers of the BIOS program, this setting looks different in appearance, but most often it is called “BOOT”.

Here we find the First Boot Device parameter, that is, the source from which the attempt will be made to boot first. And select either “CDROM” if installing from a DVD, or “USB-HDD” if installing from a flash drive.

After that, press “F10” (you may have another key or menu button responsible for saving the settings, if it is UMI BIOS), confirm the exit and reboot. The next time you boot, the system may ask you to press a key to confirm loading from the media.

We perform this action and the installation package with Windows 7 will begin unpacking the files.


After this there will be another important point - the program will ask if you want to install or update Windows? The update implies that you already had exactly the same operating system on this laptop, but it stopped working normally and you want to return it to working condition by updating the damaged system files. At the same time, all other data and files on the system disk will be saved.
If we install Windows from scratch, then select the second item.


But I recommend that you first make a copy of them on another hard drive or removable storage device, and format the partition in which Windows will be installed. To do this, click on the “Disk Setup” and “Format” links, after which we click on the “Next” button

After this, it’s quite simple - all the files will be copied, the computer will reboot several times, after which all we have to do is set the computer user name, password and enter the license key.
You can see more details about the process of reinstalling Windows 7 from a flash drive on a laptop in the video tutorial presented at the beginning of the article.

If anything is unclear, I answer any questions in the comments.
Tweet
The article is suitable for beginners who want to do everything correctly and efficiently. I didn't limit myself to simple instructions, so it turned out to be something like a mini-tutorial - this will provide an understanding of the process itself and give the necessary knowledge to novice users.
Although we are talking about installation Windows 7, my advice is suitable for Windows 8 and thrown to the sidelines of history Windows Vista.
Selecting Windows 7 version
Assembly or original distribution?
So-called “Windows builds” are very popular on the Internet. Why are they good and why do many experts advise against installing them? To answer this question, as well as help with choosing a distribution (installation disk), you should first explain what an assembly is.
Assembly in this case means a modified version of Windows. Some advanced users with “skillful hands” change the settings and composition of installed components, the contents of system files, add various programs - this is how the next build of Windows is obtained. All assemblies are de facto pirated, but the advantages and disadvantages of unlicensed software will be discussed in the corresponding chapter.
Pros of assemblies:
- The user receives an externally “beautiful” and functional system with installed programs, which saves the user from routine installation and configuration work.
- Drivers integrated into the assembly eliminate the need to search and install them manually.
- Windows updates integrated into some builds eliminate the need to manually update the operating system (OS).
- The installed assembly often loads faster due to the supposedly “unnecessary” components being disabled.
- No need to waste time entering the license key and activation.
- Due to modified system files (for the sake of decoration, for example), system file protection does not work correctly. I mean not only the “System Protection and Restore” function, but also other software mechanisms hidden from the user’s eyes. Alas, many authors of builds believe that everything needs to be turned off; as a result, a system is installed on the computer that is practically helpless in matters of recovery after failures. By the way, on the Microsoft website there is a good one with the correct argumentation of why the “protection” cannot be disabled.
- Tweaks are all kinds of settings changes designed to “speed up the system.” In assemblies, tweaks are used in mass quantities. I don’t argue that some registry edits and disabling services can make the system more responsive on slow, old computers. But by disabling services and tampering with system settings, we doom Windows to crashes. What is more important to you: launching a program 0.1 second faster and constant glitches in operation, or stable operation without crashes and errors? Moreover, tweaks have virtually no positive effect on real performance in computing tasks.
- Drivers. For Windows XP, driver integration is useful, as it allows you to install the operating system on laptops with SATA interfaces. This has been well written about. I have no objections here. For Windows Vista and later systems, driver integration has become meaningless because the necessary drivers are already present in the standard distribution. Drivers for video cards, sound cards, etc. are also integrated into the assemblies, and they are often stripped down (there may be missing files somewhere). As a result, the user receives a system with installed drivers that work anyhow (no sound, the microphone does not work, the touchpad on the laptop is glitchy, etc.). The problem also manifests itself in another scenario: a person installs a modern toy and finds out that it slows down on a seemingly modern computer! What's the matter? The casket simply opens up: new versions of drivers, optimized and improved, are released for all modern games. The user, when installing a Windows build, does not think about the fact that the drivers need to be updated - after all, everything works that way. As a result, the computer does not use its power at 100%. But it was enough to follow the link and download a normal driver (I will give these links later, in the chapter on installing drivers).
- Once again about drivers. Builders also like to remove drivers for older devices. As a result, having connected an old but working printer, the user has to scour the Internet in search of a suitable driver. That is, on the one hand, it seems like there is a driver, but it doesn’t seem to be there.
- An unlicensed OS (Windows builds, I emphasize - always pirated) imposes restrictions (more on this a little later) when working with the system. Even by entering the license key, the situation cannot be corrected - the files have been changed, everything has been shoveled, activation will work anyhow, plus this is still a violation of the license agreement.
- A large set of installed software confuses beginners. In this case, they make a reasonable and, to some extent, correct decision - they simply ignore the strange icons located on the Desktop. However, programs can and do run without the user's knowledge, causing many tray icons to appear (near the clock), which again confuses the user who is not familiar with these programs. And if a curious person starts launching everything and pressing buttons, then there is a high chance of getting a buggy system or even “killing” it. The fact that each running program takes up some part of the computer’s resources is not worth mentioning - this disadvantage is obvious.
My opinion is: Windows builds are evil. Install a clean, unmodified Windows distribution if you want the operating system and programs to be as stable as possible. If you do not agree with me, I advise you not to be indignant and not to prove to me the advantages of certain “proven” assemblies, but to go here or here and ask there - people with extensive experience and relevant knowledge will answer you. Or they won’t answer, because for many it is obvious that assemblies are evil.
There are also assemblies for automatic installation of Windows, where the installation script is written and the bare minimum is integrated, for example, updates. There are no complaints about such assemblies, because their purpose is specific, their creators clearly know the purpose of such an assembly. Most often, such distributions are made using Windows AIK.
About Windows 7 editions
Windows 7 has several publications(options, versions - called differently). Editions differ in their set of functions and system requirements. For example, the publication " Home basic" works quite well on older computers with 512 MB of RAM, while " Maximum"The publication will noticeably slow down on such a computer due to the presence of such a resource-intensive component as the interface" Aero"(that same translucent window design).
The functionality of your computer depends on the choice of edition.
Performance, as I mentioned above, also varies, but this is only noticeable on slow PCs. With more than 2 GB of RAM and a processor with at least two 2 GHz cores, the difference between the editions in performance and responsiveness is almost unnoticeable. You should not choose a publication with “reserve” functions. It is better to install on your computer the version that exactly meets your requirements. Features you don't need will only get in the way and waste your hard drive and RAM space. In the future, you can always change the edition without completely reinstalling Windows.
Types of editions of Windows 7
Although I am talking about editions of Windows 7, the situation is similar with Windows Vista and the not yet released Windows 8. True, there is no point in installing Windows Vista due to the fact that it is already a “last generation” operating system, and Windows 8 currently exists only in a beta version, unstable and unfinished. I repeat once again: do not rush and run to the store for Windows 7 Ultimate. First, you should know what editions of Windows exist.
Windows 7 has six editions: Windows 7 Starter, Windows 7 Home Basic, Windows 7 Home Premium, Windows 7 Professional, Windows 7 Enterprise, Windows 7 Ultimate Ultimate). Let’s put the “corporate” edition aside, because it is intended for work in organizations. In terms of functions, this publication duplicates “Maximum”, but has a different license. Let’s also forget about “Elementary”, because this edition is only available in an installed form on cheap netbooks, and its functions are limited as much as possible. This means that we have a choice of four editions of Windows 7 available to home users: Windows 7 home Basic(Home Basic), Windows 7 Home extended(Home Premium), Windows 7 Professional(Professional), Windows 7 Maximum(Ultimate).
Aero theme support- a very nice and beautiful thing, but it eats up a lot of resources. This is especially noticeable on laptops - turning on Aero shortens battery life. Windows 7 Home Basic is different in that Aero support is disabled. You can enable Aero by cleverly manipulating files and the registry; there are many instructions on this topic. Perhaps the only interesting feature of the seemingly unattractive Home Basic version is its lower system requirements. If you have an old computer with 512 MB of RAM, you can install Windows 7 Home Basic instead of the outdated Windows XP. Games will run more slowly, since Windows 7 itself requires more resources, but the Home Basic version is quite unpretentious in terms of resources due to its “lightness” in terms of components, requiring less RAM for its operation. And if you plug a fast flash drive into USB and turn on ReadyBoost on it, the “old horse” will get a second wind! This will be especially noticeable with a slow hard drive. Aero is supported by all editions except Home Basic.
Windows Media Center- a good thing, its functionality goes far beyond the scope of a regular video player. True, I don’t use Media Center, PotPlayer is enough for me. But you may like this program. All editions of Windows support it except Home Basic.
Home Group Support- a useful feature that allows you to use shared folders and files, as well as printers and other devices. It differs from the usual “Sharing files and folders”, familiar to users of Windows XP and Vista, in the simplicity of its settings. See the settings in the Network and Sharing Center. A good article talking about Windows 7 Homegroups is here. All editions of Windows support this useful technology, except for the deprived Home Basic.
Windows XP Mode support- an indispensable thing for those who use old programs that do not work in Windows 7. Windows XP Mode is Windows XP installed in a virtual machine. All programs launched in this mode actually run in a virtual computer running Windows XP, so the window of such a program will be framed by the recognizable blue frame of the Windows XP theme. Owners of the Professional and Maximum editions can download and install this component from the Microsoft website at any time. So if they tell you that some program does not work in Windows 7 and you need to install Windows XP, educate this person about Windows XP Mode. Two disadvantages of this technology:
3D games do not work in this virtual machine. - Windows 7 Home Basic and Home Premium editions do not support Windows XP Mode.
Installing programs in this virtual machine requires unnecessary movements - it will be a bit difficult for a novice user.
Plus: the issue of compatibility with Windows XP disappears - the programs will run in real Windows XP, and not Windows 7. Moreover, all documents, files - everything opens normally in programs running in virtual Windows XP. From the user's point of view, everything works as it should, only the window is framed by the blue frame of the Windows XP interface.
Domain support- the ability to connect a computer to a domain, which is of little use for a home user. Read more about domains. Works in Professional and Maximum editions. Relevant for those who use their personal laptop for work, connecting to a network with domains.
Drive encryption with BitLocker- for conspirators and those who store Very Important information on the computer. The job description is located. Works only in the Ultimate edition. Fortunately, this is not the only solution for disk encryption; there are also free ones. For example, TrueCrypt.
It seems to me that for most users it will be enough Home extended editions of Windows 7. There is little point in installing the Maximum or, God forbid, the Corporate edition. Besides the price...
Windows 7 system requirements
Which computer is suitable for installing Windows 7 is written in detail on the Microsoft website. I will limit myself to a brief retelling with an explanation:
- The processor frequency must be 1 GHz or higher. Of course, comfortable work is impossible on such a slow computer, but it will work. Windows 7, unlike the outdated Windows XP, effectively uses multi-core processors, but will also work on a single-core processor.
- RAM must be 1 gigabyte or higher for a 32-bit system, 2 gigabytes for a 64-bit system. Read more about this in the next chapter, I’ll just say one thing - It is quite possible to run both 32- and 64-bit Windows 7 on a computer with 512 MB of RAM. Windows itself will work quite quickly, but if you run any program, there will be slowdowns due to lack of RAM. Conclusion: it will be possible to work on a computer with 512 MB of RAM, but you will have to be patient (I advise you to change the window design to the classic one, like in Windows 2000, in order to save fifty or even more megabytes of RAM). On computers with 1 GB of RAM, comfortable work is possible, with the exception of games - any modern game requires 2 or more GB of RAM and this does not depend much on the version of Windows.
- The video card must support DirectX 9 at a minimum. In fact, Windows 7 will work on an older video card, as long as there is a compatible driver. Also, with an old video card that does not support at least DirectX 9, the beautiful Aero interface (translucent window design) will not be available. I talked more about DirectX in the post.
- 16 gigabytes of free hard disk space for 32-bit Windows 7, 20 GB for 64-bit. Please note - this is the bare minimum; there will not be enough space for programs and games.
- Internet is also very desirable- to receive updates, new antivirus databases, and so on.
To find out what kind of computer you have, you can download and run the program - it is easy to use and the information it gives about the computer hardware is understandable to novice users. Also further in the text there will be other tips on the topic of determining the contents of the computer.
Which system to choose - 32 bit or 64?
There are endless debates about what bit capacity the system should be. It is unlikely that I will be able to put an end to this issue. At least I’ll tell you in simple words about the current situation with the bit capacity of systems.
The system capacity can be 32 bat and 64 . It is more correct to denote the bit depth as x86 And x64, but this confuses beginners (I’ve come across opuses like “which system to choose - 86 bit or 64?”). Therefore, to avoid confusion, I will use the numbers 32 and 64.
We, as PC users, notice the most distinctive feature between 32- and 64-bit Windows: 32-bit systems cannot work with more than 4 GB of RAM (in fact, even less - the system “sees” about 3.5 GB). There is a way to force a 4 GB 32-bit system to be seen using a special patch, but there is no particular point in this - Windows begins to behave unstable. I talked more about the limitations of 32-bit Windows in the article
64-bit Windows 7 allows you to work (not just display a figure about the amount of installed memory, but also effectively use this volume) with 192 GB of memory, which is good. 64-bit Windows allows you to run 32-bit programs. At the same time, the 32-bit version cannot run 64-bit versions of programs. 64-bit programs will have a speed advantage over 32-bit versions due to more efficient calculations. Also, the x64 system is better protected from viruses (but an antivirus is still needed).
There is also a downside to the coin: 64-bit Windows and 64-bit programs take up a little (100-150 MB in total) more RAM due to the fact that the amount of data they work with increases. However, this difference is not always noticeable. The second problem is that some 32-bit programs do not run on a 64-bit system or crash with errors. Again, the number of incompatible programs is small enough to ignore this drawback.
My advice: if you install Windows 7 on a personal computer with at least 2 GB of RAM, and plan to add more in the future - choose x64 version. In this case, one fine day you will go to the store, buy a memory card, insert it into your computer and continue to use the computer, rejoicing at the increased speed. The added RAM will be used, everything will be fine.
If the computer had 32-bit Windows, then there will be more hassle. To use more than 3.5 GB of RAM (otherwise why did you install more RAM?), you will need to completely install the 64-bit version, because you cannot simply update the system bit depth. You will have to delete everything, clean or format the hard drive, and then install Windows x64 from scratch. There is a good article about this Windows 7: Migration to 64-bit version. By the way, when you purchase licensed Windows, the box will contain disks of both bit sizes - x86 and x64.
Helpful information
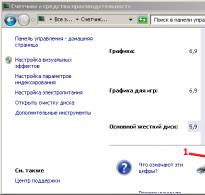
To determine the bitness of your installed Windows, open Control Panel - System and Security(if you have categories disabled, this item will not appear, the next one will appear immediately) - System:
If you have a 64-bit operating system installed, it is easy to guess that the processor in your computer is 64-bit, because 64-bit Windows requires an appropriate processor. If you have 32-bit Windows installed and you doubt that your computer’s processor supports 64-bit (which is currently unlikely, unless your computer is more than 7 years old), you will have to use the free CPU-Z program - link. The program will show information about the processor:
The processor supports 64 bits if one of the following names is present in the Instructions line: EM64T, AMD64, Intel64.
About the Windows license and a useful trick
I won’t talk about the fact that piracy is bad, evil, etc. This has been discussed and is being discussed, writing about it again is a waste of time. It is more interesting to talk about what distinguishes “pirated” Windows from licensed ones. I will also share a useful trick regarding the trial period of using Windows, which many novice users do not know about. This will allow you not to use “activators”, which will allow you to legally use Windows for a long time.
Technical support
It would seem, what is the difference between a disc for 300 rubles and that box over there for “a lot of money”? It is huge, but not everyone knows about it. Microsoft, unfortunately, is somehow modestly silent about the “goodies” of the license. The only proper description of the benefits of the license is on this page, where I want to especially highlight an important point:
“Oh, well, I can ask a programmer I know!” - skeptics will dismiss it. And they will be wrong. Microsoft technical support has an advantage over all “programmers”: people working in technical support have much more experience resolving problems with the system than anyone else. In the end, this is their job, their bread, and their knowledge is appropriate.
By the way, take a look at the page Troubleshooting problems in Windows 7 - a lot of useful things are written there. There are, unfortunately, some bad nuances. The first is related to the OEM license. If you bought a laptop or desktop computer with an OEM license (Windows, which comes with the computer), then the store that assembled your PC or the computer (laptop) manufacturer is obliged to provide you with technical support. That is, if Windows malfunctions on such a computer, go to the store where you bought the computer with an OEM license and demand that the problem be solved. Microsoft technical support can simply refer you to the same store or to the manufacturer. The second nuance is that technical support takes longer to solve problems than a knowledgeable person nearby. On the other hand, Microsoft employees will not give bad advice, but a familiar “programmer” may make a mistake.
Legal right to use
A Windows license legally secures your right to use this operating system on your computer - that is, no “checks” will be scary.
About Windows updates
In addition to legal subtleties and the right to contact normal technical support, and not run around the Internet looking for advice, there are a number of advantages associated with the reliability of Windows. The most important of them is related to updates for Windows and programs.
Antivirus is not able to cope with 100% of all threats - this is a fact. There are many ways to launch a virus without direct user interaction. For example, the Kido virus (description), which has infected more than 12 million computers as of January 2009, actively exploits the vulnerabilities of the Server service. If all Windows users installed updates that covered these vulnerabilities, then the above-mentioned computer virus epidemic would not have happened. Reality is a harsh thing, which is why the virus still lives on from users who have not enabled the update function.
In pirated versions of Windows, the update function is usually disabled, because Windows activation system updates come along with updates that cover security holes and fix problems with programs. As a result, a person using Windows activated by an illegal method (activator) will either have to forget about updates and expose his computer to attack, making it a potential breeding ground for infection (I repeat - antivirus in this case is not a solution to the problem!), or control the installation of updates by checking - Will the activator break after updating the protection? This is how computers that are infected with viruses appear - a novice user follows the recommendations for unlicensed activation, disables the update function, and then wonders: “I have an antivirus, why do I have viruses on my computer?!”
I won’t say anything about assemblies - they sometimes come with malicious programs (for example, the Zver assembly). So licensed Windows is more secure than pirated Windows. And this is not advertising, but a proven fact. To be fair, I would like to note that sometimes activation fails on licensed Windows. The reasons for this are not entirely clear. However, this happens less often than when using pirated activators. There is interesting information about Windows Update on Wikipedia - link. You will find the updater itself in the Control Panel and in the Start menu - All Programs.
I recommend in " Parameter settings» check if automatic updates are enabled:
Some drivers are also updated through Windows Update. While writing this article, the author just received new updates:
Free antivirus Microsoft Security Essentials.
It is available to all licensed Windows users; you can download it from here. The antivirus is pretty good. Clearly better than free Avast, which for some reason is very popular, despite its helplessness.
Windows trial period
The same trick I talked about earlier. If you do not have a Windows license, but you agree with my arguments about the advantages of licensed software and, unfortunately, do not have the money to purchase a license, you can do this: install Windows 7 and Not activate it. In this case, the trial period countdown timer will work, which is 30 days from installation Windows. The main thing is to install the edition of Windows that you want to buy in the future.
When you buy Windows, just open the “System” window - at the very bottom there will be an activation link. If you haven’t managed to find money in 30 days (let me remind you, Windows 7 Home Premium costs 4,290 rubles, which is not that much), then you can reset the trial period and use the 30-day trial period again. And so on up to three times. In total, you can use Windows for free without activation or reinstallation until 120 days! I think it is quite possible to collect the required amount during this time. Instructions for extending the trial period can be found here.
Installing Windows 7
Where can I get the Windows distribution?
Although Microsoft itself recommends installing Windows from the original licensed disk, the site allows installation from other sources, as long as the contents of the disk coincide with the original one. Disk images that supposedly match 100% with those that come in beautiful boxes with licenses are, for example, here - link. Naturally, there is no point in downloading the entire contents of a torrent distribution; you need to select a separate disk image. How to do this is written. How to burn a downloaded disk image to a DVD, written
If you don't want to burn a Windows installation disc, you can burn the installation to a USB flash drive. There are two good instructions for this: How to install Windows 7 from a flash drive using WinToFlash (easier) and Installing Windows 7 from a flash drive (more difficult). It doesn't matter which method you choose.
Installation process.
Now that we're done with the preparations, let's begin the installation. Read my article to configure your computer to boot from a disk or flash drive. If everything is configured correctly, when you turn on the computer, instead of loading Windows, a black screen with the line “” will appear.
Press any button and the installation will start (a loading indicator will appear). After which we see a window with language settings, where everything is already configured. Click " Further»:
The next window is interesting with the item “ System Restore" If you already have Windows Vista or 7 installed, which for some reason does not work, this item may help you. But at the moment we are installing Windows 7, so we click the " Install»:
Then select the Windows edition. Choose the one for which you have a license. If you install Windows on a laptop that already had Windows 7 preinstalled, there will be a sticker on the bottom of the laptop with the license key and edition information.
After selecting a publication from the list, click “ Further" In the next window you must accept the license agreement. For some reason I remembered an episode from the animated series “South Park”, where the main characters forgot to read the license agreement and it turned out that... Well, never mind. We agree and click “ Further».
Next, we are given items to choose from Update(if the computer already had Windows) and Full installation. Windows XP cannot be upgraded to Windows 7, but Vista to 7 is quite possible - all settings and programs will be saved. Since I’m talking about a “clean installation from scratch,” click on the “Full installation” option:
The next window requires explanation - what and how. We are asked to partition the disk:
The disk can be divided into sections. Each partition will appear in the Computer window as a separate hard drive. The process is called "logical disk partitioning".
In the screenshot you see that the disk of the computer where I install Windows 7 already has two partitions. Section 1 created Windows 7 for its needs (the bootloader is a kind of protection against those who like to delete files and against malware). This section is hidden and you will not see it in the “Computer” window. Its size is 100 MB, which is trivial by modern standards. Section 2 contains already installed Windows 7, which I want to remove by installing a new Windows. In principle, you don’t have to delete the old Windows, then after installing Windows 7 on the disk C: there will be a folder Windows.old, where you will find the old operating system files. It will also contain a Users folder with documents, shortcuts and other files from the user of the former operating system.
Do not delete the Windows.old folder!!! More precisely, you can delete it, but only using the disk cleanup function. Instructions for correctly deleting the Windows.old folder are located It is also possible to restore Windows from this folder, but there is no guarantee of normal operation. Instructions In addition to everything, there may be other sections. For example, laptops have their own Windows recovery system, for which an image of an already installed and configured system is stored on a hidden partition, which, if desired, can be “unpacked” instead of a buggy Windows. Whether to delete this section or not is up to you.
I recommend the simplest and most reliable way- format (clear the contents) of the Windows partition and install our Windows 7 there. To do this, click “ Disk setup", click on Section 2(if you had Windows XP or Vista, then this will be Partition 1, which has the type System) and press Format:
I hope you have backed up all your documents and files in advance because drive C: will be cleared. The desktop is also the C: drive. Nuance: if you previously had Windows installed incorrectly, then Partition 1 may be drive D: or be designated by a different letter. Moreover, the system could be on a drive other than C:, then the confusion would be even greater. Pay attention to the partition sizes to format the partition you need. In case of any problems, the author of the article is not responsible! Don't forget to make backup copies of all important documents by saving them to a DVD, flash drive or another computer. After formatting, click " Further”and the installation itself will begin:
This stage can take up to half an hour. It is not necessary to sit and look at the monitor so as not to damage your eyes. After installation, the computer will reboot and the message “ Press any key to boot from CD or DVD…" - but you don’t need to press anything for the installation to continue from the hard drive. A username entry window will appear. Here I will share with you a very useful trick - enter the name only in English letters:
In the future, you can change the name through the Control Panel - User Accounts, writing it there in Russian letters. But at the first stage after installing Windows, it is best to write the name in English so that games and programs do not “glitch”. Also write the computer name in English. Next, you can set a password for your account:
Here you can specify a password
It's not obligatory. In the future you can set a password in Control Panels - User Accounts. After clicking Next, the next step is to activate Windows.
However, you can skip it and enter the key later, even after a month or six months - I talked about this in the chapter on licenses. In the next window, I strongly recommend clicking the largest button:
I hope you have unlimited Internet, because the size of the files that Windows will download after installation can total more than half a gigabyte. The fact is that after the release of Service Pack 1 (service packs are sets of updates), a fairly large number of updates have already been released. Naturally, they are not included in Service Pack 1 for Windows 7, because the first service pack for Windows 7 was released at the beginning of 2011. Next, it remains to set the time and time zone:
Installing drivers
I talked about such an important and mandatory step as installing drivers in - both operating systems are identical in terms of installing drivers, there is no point in duplicating the material.
Windows setup
What can and cannot be customized
Oddly enough, you can go into Windows settings. This is your computer, you need to customize it to suit you. Nothing bad will happen if you open it Control Panel and look at various items, change the wallpaper on the Desktop... This is allowed, this is what the Control Panel is for. But " tweaks"(hidden settings), about which there are articles written on the Internet that copy each other, should not be done. Such settings will not increase speed, but glitches will definitely appear. Maybe not right away, but they will appear. All these registry edits, changing the startup type of Windows services, changing interrupt priorities and other settings with interesting words are just in theory can increase computer performance. In practice there is only one harm, and the acceleration is noticeable due to the placebo effect.
Conclusion: Any settings not available in the Control Panel may be harmful. You can do whatever you want in Control Panel because it's your computer, just read the help first (to display help, click F1 on the keyboard - there is a lot of useful information written there). The “Administration” folder in the Control Panel contains the very thing that should not be touched, although there are also very useful “Event Viewer” and “System Monitor” - these are information components that allow you to identify problems invisible to the eye in Windows.
Screen resolution
For beginners, it is often a problem to set the screen resolution correctly. Often, a novice user does not know what screen resolution is. However, it is important to know this and be able to configure it. Firstly, if the resolution is incorrect, the picture on the screen will be of incorrect proportions, and secondly, it will be cloudy.
You should protect your eyes, so you need to adjust the resolution: right-click on the Desktop and select " Screen resolution" The setting we need is there, with the most optimal resolution highlighted with the word “recommended”:
If such a word is not in the list, press F1 on the keyboard - help for the open window will appear. In our case, help on setting resolutions will open with a table of recommended resolutions for different screen sizes. If the recommended resolution is set, but the image on the screen (or part of it) is still cloudy, look for the “ button on the monitor Auto" - almost all monitors have such a button and/or setting in the monitor menu that allows you to automatically adjust the image to maximum clarity at the correctly selected resolution. The monitor itself does not select the resolution; this will have to be done in Windows.
Mouse settings
Mouse arrow sensitivity is adjusted in Control Panel - Mouse - Pointer Options:
If the computer is expected to be used by a child or an elderly person, reduce the pointer speed so that they will be able to much easier aim the mouse at on-screen elements.
Setting the desktop wallpaper
Right-click on the Desktop - item Personalization- there you will find everything you need. If you have Windows 7 Home Basic or Starter, then you should know that the personalization settings there are limited, but there is a full-fledged replacement for the “Personalization” window - Personalization Panel for Windows 7 Starter and Home Basic.
Changing the keyboard shortcut for switching input language
I don’t know about you, but it’s inconvenient for me to switch the keyboard language from Russian to English and back using a keyboard shortcut Alt+Shift. I prefer Ctrl+Shift, because these buttons can be pressed with one finger, without looking. If you agree with me, then here is the recipe: to change the keyboard shortcut, go to Control Panel - Change keyboard layout and other input methods - Change keyboard - Switch keyboard - Change keyboard shortcut. Everything will be clear later.
1. Settings are not a goal, but a means to achieve comfort. Set up only what will ensure comfort not for the computer, but for you.
2. If you want to learn how to set up a network, restore Windows and simply gain knowledge, I advise you to look at the FAQ on laptops. Don't pay attention to the mention of laptops - Windows is installed the same everywhere, the principle is always the same.
Useful programs
After installing Windows and drivers, the computer will be ready for work, but only for what? Of course, you need to install programs. Which ones exactly - I can recommend several.
I don’t recommend installing dozens of programs just out of curiosity or “just in case,” because this is one of the reasons for a slow computer. If you like to install “a lot of interesting programs”, say goodbye to the stability and fast operation of Windows. By the way, for optimization you can install one that can keep your PC “in good shape”:
a) clear browser caches to launch them quickly;
b) remove any garbage from temporary folders to free up disk space;
c) do it automatically according to a schedule - install, configure, enjoy.
Other:
Browser- this is a fairly important program, because it interacts with the Internet. There is a list of browsers with download links in . I recommend Google Chrome - it is more convenient than standard Internet Explorer.
Antivirus You can install it for free. I talked about the most popular free antiviruses in the article
Office programs. If you don't have a Microsoft Office license, you can try the free LibreOffice - link. The capabilities of this free “Office” are quite enough for typing text, editing tables, and creating presentations. Externally, LibreOffice programs are similar to Microsoft Office 2003, so you can get used to it. Not so important, but it is recommended to install the Microsoft Visual C++ and .NET Framework components from the list - they will be useful for the correct operation of many programs and especially games.
Bottom line
In this article, I told you almost everything about the correct installation of Windows for beginners. Some of the instructions - especially for installing drivers - are available in the form of links, because I have nothing to add on my own, and I don’t want to retell it.
If there are any problems during installation, check to see if you missed anything in the article? Did they do everything exactly as I wrote? 90% of problems are due to inattention, the rest is a problem with the technology itself. If any moment seems incomprehensible to you, read it again. Perhaps you missed something. Feel free to write your wishes and questions in the comments - based on your suggestions, I will edit the article so that it becomes more understandable.
In this article we will look at a detailed step-by-step installation of one of the most modern and popular operating systems for desktop and mobile computers - Windows 7. This brainchild of Microsoft turned out to be so successful that in two years of sales it managed to catch up in popularity with the most used one already for many years, the system in the world is WindowsXP. Therefore, more and more users want to see this particular OS on their home computer, and the question of installing it now is extremely relevant. Our computer portal, naturally, could not ignore this topic and prepared an installation guide for you, trying to make it as clear and understandable as possible even for beginners.
SETTING UP YOUR COMPUTER TO BOOT FROM DISK
When you turn on the computer, as a rule, a short message appears indicating the key with which you can enter the BIOS settings menu. Be careful, as this inscription disappears from the screen quite quickly, especially on laptops. If you couldn’t see it the first time, immediately restart your computer using the “Reset” button and try again. When loading begins, a large graphic image may appear on the screen, obscuring the service inscriptions on the screen. To remove it, press the key.
List of most frequently used keys:
- Desktops - Del (almost always), F1
- Laptops - F1, F2, F3, Del, Ctrl + Alt + Esc. In the case of laptops, keyboard shortcuts can be very varied, depending on its model. You can find this information either online or by calling technical support.
Having found out the key responsible for calling up the BIOS settings menu, restart the computer again and at the very beginning of boot, press it several times (once is enough, but to accurately catch the right moment, pressing it multiple times will not hurt). If everything is done correctly, the settings window should open.
As a rule, the most common two types of BIOS are:
Phoenix AwardBIOS
.jpg)
If your window looks like this, then you need to select a section here Advanced BIOS Features, and in it the paragraph First Boot Device assign the value CDROM. Then press the key and select Yes in the dialog box that appears.
American Megatrends BIOS

Or if your window has a gray background, like in this screenshot, then select the section at the top Boot and in the subsection Boot Device Priority in point 1st Boot Device set the name of your optical drive or, as in the screenshot, just CDROM. Then press the key and select Yes in the dialog box that appears.

For mobile devices (laptops), BIOS programs can vary greatly, and it is not possible to list all possible options within the framework of this article. In any case, you should find an item in the settings window whose name is associated with boot (Boot) and in it set the optical drive (CDROM) as the first device.
STARTINSTALLATIONS
After turning on/rebooting the computer, if any Windows operating system is already installed on your computer at that moment, then after some time you will see the message “Press any key to boot from CD or DVD” on the screen. boot from CD) which is what you should do.

Be careful as you will only have 5 seconds to enter the system installation. If the current operating system starts loading, it means that the opportunity to start the installation was missed and you should restart the computer again for the next attempt.
If you are installing the system on a new computer or a blank hard drive, you will not see the previous window; Windows installation should begin automatically.
So, if the computer starts booting from the installation disk, then the system installation start window should appear in front of you, in which you can see the process of downloading the initially necessary files.

If this window does not appear, but the old operating system starts loading (if it was installed) or messages appear that the boot disk was not found (if installed on a new computer or hard drive), then this means that your computer was unable to boot from the disk and you should return to the previous step for setting up the BIOS.
After downloading the main files, you should see a window for setting up language settings, date and time format, as well as keyboard layout, in which the default settings for Russia will be set.


The system restore option may be useful to you in the future if problems arise with the installed system, for example, due to damage, deletion or unauthorized modification of its system files. As a rule, this leads to Windows becoming unstable or refusing to boot at all. In this case, you can restore the original system files from the installation disk using the above point.
In general, the “System Restore” section in Windows 7 is a fairly powerful tool for fixing various kinds of problems that arise during its operation, and we will definitely devote a separate publication to it, and within the framework of this article, click the “Install” button to proceed directly to installation.
In a few minutes, a window with a license agreement will appear in front of you, the terms of which must be accepted by checking the appropriate box and clicking the “Next” button.

In the next window you will have to select the installation type:

As you can see, here we can choose two options: update and full installation. The “Update” item can be used if you want to update your old operating system to Windows 7, while maintaining all installed programs and settings. True, for this, the installation of the “seven” must be launched directly from your already installed OS. It should also be remembered that this is only possible from Windows Vista, and the update is not applicable to operating systems of older generations, including Windows XP. In general, this type of installation is not the best solution. The fact is that not only the settings of the previous system will migrate to the new Windows, but also all its problems, brakes and glitches. And in general, stable operation of the system and previously installed programs is not guaranteed in this case. Therefore, the preferred type is the full installation, which is what you should choose.
At the next stage of installation, we have to select a partition on the hard drive to install Windows. Here, I would like to make a small digression and provide some useful recommendations for partitioning a hard drive into system partitions:
- Don't allocate all of your hard drive space to one single partition. This is considered bad manners and can cause you a lot of trouble in the future.
- Modern hard drives have quite large capacities for storing data and therefore it is advisable to divide them into several thematic sections.
- It is recommended to set aside a separate section for installing the operating system and necessary software and not fill it with your personal data.
- You should choose the size of the system partition with a margin, taking into account that for Windows to work correctly, 15% of the space of this partition must remain free.
- Don't create too many sections. This will complicate navigation and reduce the efficiency of distributing large files and folders
DEFINITION OF SYSTEM PARTITION
Now, let's get back to the installation. From this point on, the installation can proceed in two ways:
Option 1: You have a new computer and the hard drive has never been allocated. In this case, a window with the following content will appear in front of you:

To partition the hard drive into partitions, you must select the item: “Disk Settings”. In the additional options that appear, select “Create” and enter the required partition size in the window next to it. Please remember that you must specify the size in megabytes. Calculate it based on the fact that 1 gigabyte = 1024 megabytes. As a rule, for Windows7 and related software, 60 - 100 GB is enough, but you have the right to make it larger if necessary.

Having specified the required size of the future system partition, click the “Apply” button. Next, to use all its capabilities, Windows will ask you to create an additional partition for it. Don't be alarmed, it will only take up 100 MB of free disk space and will be invisible to you.

By clicking “OK” we will return to the screen for selecting a partition for installing Windows.

As you can see, there have been changes here. Now we have a partition reserved by the system for its own needs, a newly created partition and the remaining unallocated area. From the unallocated space on the disk, in the same window you can create additional partitions in the same way that we used above, or you can postpone this action until later and finally partition your drive in Windows.
Having made the necessary decision, select the part of the disk on which we plan to install the operating system and click “Next”.
Option 2 - If your computer already has an operating system installed. Then your hard drive is already divided into logical areas, and you will see a window listing all found partitions on it, for example:

Attention! All further manipulations with the found partitions may lead to the loss of your data, so be very careful in your actions.
If the current partition of the hard drive does not suit you, then you can delete existing partitions in whole or in part by selecting the appropriate part of the disk, and then the “Delete” option. You have the right to split the unallocated space on the disk that appears after this at your discretion using the above method, discussed in option 1.
If you are completely satisfied with the current disk layout, then you need to decide in which of the existing partitions you will install Windows 7 and whether you want to save the information available there. In this case, before moving forward, let's first take a look at the possible installation options, after which you can make an informed decision without pointing your finger at the sky.
You have selected the partition on which your old operating system is currently installed, and you plan to save the data stored on it. In this case, after clicking the “Next” button, before starting the installation, you will see a warning window that the previous copy of Windows with all its files and folders will be moved to the “Windows.old” folder. The rest of the information will be untouched. Clicking "OK" in the warning window will begin the installation process.

There is one significant drawback to this setup. As a rule, after using the operating system for a long time, the partition on which it was installed becomes very littered and contains a lot of unnecessary files. Adding to all this a new operating system with accompanying software, you will be faced with, at a minimum, irrational use of hard disk space, file defragmentation, and even possible overflow, which will undoubtedly lead to a decrease in system speed.
If you have selected a hard disk segment that does not contain Windows as the future system partition and want to save all the stored information on it, then the installation will begin immediately after clicking the “Next” button.
If you plan to install Windows 7 on a blank partition (the preferred option of all) and you have either already saved the information on it in another place, or you do not need it, then you should format it before starting the installation. To do this, select “Format”. The installer will issue a warning that this partition may contain data that is important to you and it will be destroyed.

After clicking the “OK” button, the selected part of the disk will be completely cleared of the information stored there and to begin the installation, all you have to do is select “Next”.
INSTALLATION AND INITIAL SETUPWINDOWS
So, after selecting the system partition, the system installation process will begin, during which files will be copied and unpacked, components and updates will be installed.

During installation, your computer will automatically restart several times, and the entire procedure may take from 10 to 20 minutes, depending on its power.


Finally, after the installation is completed and the computer is rebooted again, the first Windows initial setup window will appear in front of you, in which you will have to enter the user name (the name of your account in the system) and the computer (the name under which it will be visible to other users on the network).

On the next screen, you can create a password for your account or postpone this action by leaving the fields blank and clicking the “Next” button.

The next step will be the ability to select settings for automatic Windows updates, designed to regularly check via the Internet for the availability of all kinds of system security patches, critical updates and service packs on the official technical support website. Enabling automatic updates is desirable, but not required at this stage, since you can configure this setting more flexibly after installation from the control panel.

After selecting your security options, Windows Initial Setup will prompt you to check your date and time settings. If everything is correct, click “Next”.

If network card drivers were installed during the installation process, you will see a network settings window in which you will need to select the location of your computer.

After you make your selection, a window will appear to connect to the network and apply settings.

At this point, the initial setup of the system can be considered complete. After the final application of the settings, a welcome window will appear in front of you, then the system will prepare the desktop, the appearance of which will mark the completion of the installation of Windows 7.


Immediately after completing the installation of the new operating system, you should install all the necessary drivers for the installed devices, after which you can begin installing the software.